
 Reply With Quote
With the 2 layers merged :
Then I correct the edges (badly cut) with the brush by cloning the black background :
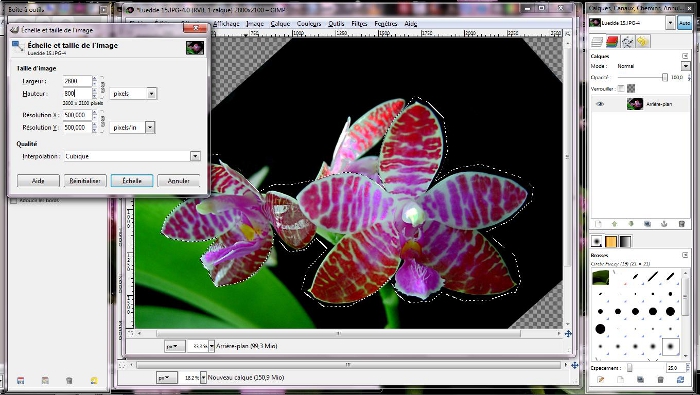
For the 3rd photo, I first rotate it for a proper orientation of the flower :
Then I draw the interesting area and I copy :

Welcome to OrchidTalk Orchid Forums
The Friendliest Orchid Community on the Internet!
OrchidTalk - "Bringing People Together to Grow Orchids Better!"
Let us help you grow your Orchids better; Join our community today.
YES! I want to register an account for free right now!
Register or Login now to remove this advertisement.


 Senior Member


This was requested on another forum and I'm sure that Maura will appreciate.
I hope this helps you to understand how I do that.
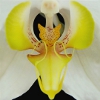
My Phal. lueddemanniana, blooming now.
First of all, choose different interesting photos, generally 2 to 4 photos, with a black background, it's easier :
Create a new "virgin" photo, with black background :
Copy and paste (where you want) the 1st photo (in whole or a part) in the new one :
Don't forget to save your work at each step because sometimes Gimp stops working and crashes !!!
For the 2nd one, I decide to cut a part of the photo (drawing myself with the tool) and pasting it in a new layer (useful if the photos overlap at the end). Here, only the new transparent layer is visible :

Senior Member
With the 2 layers merged :
Then I correct the edges (badly cut) with the brush by cloning the black background :
For the 3rd photo, I first rotate it for a proper orientation of the flower :
Then I draw the interesting area and I copy :
Senior Member
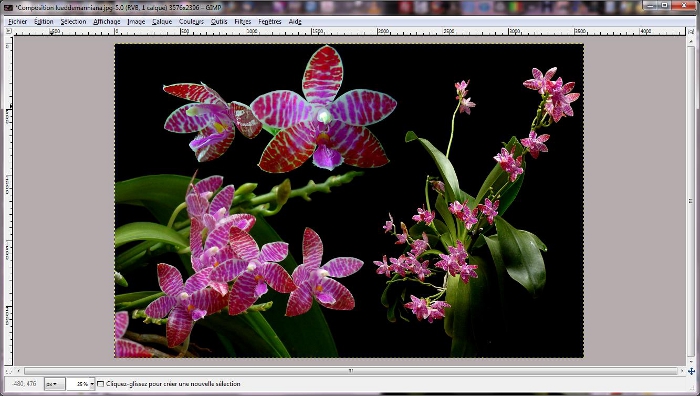
And paste it in the new photo montage :
Then, I correct the edges by cloning the black background :
Sometimes by enlarging the display to be precise :
After 40 minutes of intensive work :
Senior Member
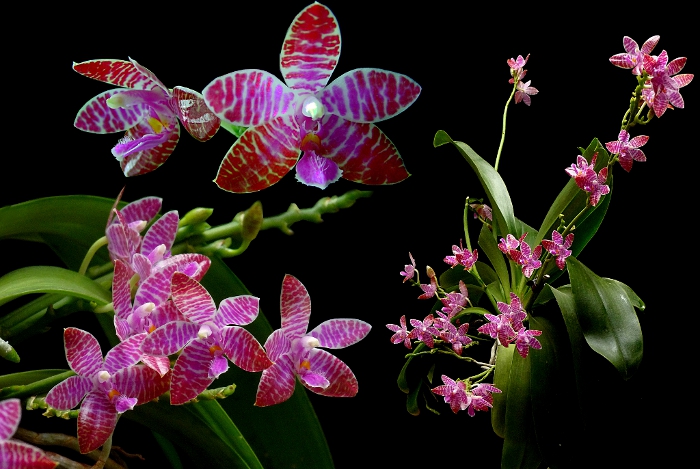
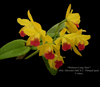
And the result for you :
 apprentice

cool......what material do you used as background during the initial part where you photographed those blooms? any special cloth for photography? or any black card board will do? i tried using a black t-shirt of mine before but it does not turn out totally black as yours.
Senior Member
I use a large piece of black tissue (the best is velvet). I put it one meter or more behind the plant (to be fuzzy). I frequently correct the black background as a first step (color selection and contrast modification).
Looking at the result, I think that I forgot to rotate the 1st photo for a better display.
apprentice
thanks Eric
 Dreaming with my eyes open...

Bravo!
cheers,
BD
 Senior Member

Awesome !! The best tutorial, I will forward this link to my sister as well she is into photography and editing. Thanks a tonne !
 Senior Member

Originally Posted by eorchids

I most certainly do!
A couple of things - I agree with you about black velvet - after trying all kinds of black materials, I found that all but the velvet would return a blue cast on the photo.
Like you, I use the black background to make sure my colors are correct - if they aren't, the black won't be a true black.
You can place the background more closely behind the subject and still have it blurred out, but you have to make f-stop adjustments - for my point'n shoot - I just do it by eye.
Do you think you could give a 2-sentence description about GIMP? I think it would be helpful to a lot of people.
 Posting Permissions